




Looking for a way to introduce some variety to your camp cooking?
Maybe add some challenge, or impress your friends? Just one utilitarian piece of equipment can help you do it all.
What’s more, this simple hunk of metal can make cooking and cleanup a lot simpler. With it, you could make breakfast for a dozen in less than an hour, with minimal preparation. Same goes for lunch or supper, if you like.
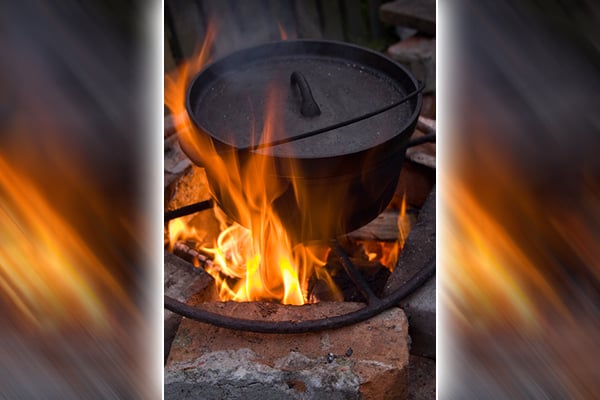
If you haven’t guessed, I’m talking about the Dutch oven (affiliate link), and you’ve at least heard of it at some point. But have you used one?
What’s black is evergreen
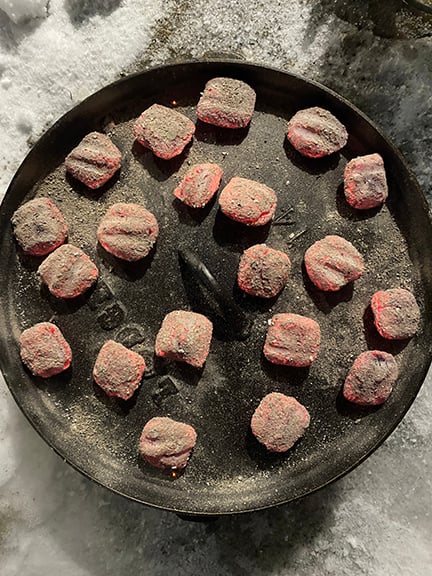
The Dutch oven comes in many forms (affiliate link). When it comes to outdoor cooking, we’re normally talking about the black, seasoned-metal type with legs and a flat top.
Along with the rest of the cast iron array, it’s the original non-stick cookware. It also boasts quite an American pedigree.
If the rumors are true, Paul Revere is responsible for the Dutch oven legs and lid shape we all know. Lewis and Clark reportedly brought one on their famous expedition. No doubt many thousands hitched rides on wagons headed across the frontier, in land rushes and cattle drives.
These days, Dutch oven cooking is inextricably tied to the scouting experience. They sometimes come out when it’s time to make a fun dessert, or even show off a little. The method is also presented as part of the famous/infamous Cooking merit badge, and could easily have a merit badge all its own. But it’s not just for scouts…
First course
For the uninitiated or those who haven’t used one in quite a while, something called the “Mountain Man Breakfast” may be the perfect way to get started.
The great thing about this meal – like the Dutch oven itself – is that it’s versatile and easily adapted to the needs of the day. Evidence of this is how many different results turn up in an internet search.
The exact recipe varies by the source, and can be built to suit crowd size or preferences. Add onions, peppers, seasonings, and more if you feel like it. But to start, the Mountain Man is essentially sausage, hash browns, scrambled eggs, and cheese.
Most recently, I used one pound of bulk pork sausage, two pounds of hash browns, a dozen eggs, and about two cups of shredded cheddar. I also threw a diced red pepper in with the hash browns because it was readily available. That turned out to be a great addition.

If working with a 12- or 14-inch Dutch oven, start a couple dozen or so charcoal briquettes on the ground. When they’re all fired up, spread them into a single layer and set the pot over them. Add the sausage and cook through, turning and breaking it up with your metal flipper.
When the sausage is all browned, remove it to a bowl for a few minutes. Pour a generous amount of oil into the oven and add the hash browns. Turn them over occasionally, adding oil if they stick. When they get hot (not necessarily browned), spread them out and add the sausage back. Pour the beaten eggs over the top, and sprinkle a good amount of cheese over everything.
MORE COVERAGE FROM MINNESOTA OUTDOOR NEWS:
Minnesota hunters from Alborn and Brainerd take 701-pound, 519-pound bears
Minnesota’s Hunter Walking Trails system adds hundreds of miles
Mixed conditions, but more ducks greet Minnesota’s opener this Saturday
Put the lid on the pot, and distribute about two-thirds of the briquettes over the top.
Allow it to cook, covered, checking first for doneness in about 15 minutes. Like quiche, it is finished when a butter knife inserted into the thickest part comes out clean. That is, maybe oily but without raw egg.
As mentioned earlier, your Dutch oven should clean up easily – if seasoned properly. Scrape it out with the metal flipper while it’s still pretty warm.
Wipe it out with a paper towel, then scrape and wipe some more until it’s all clean. No need to involve soap and water; it’s ready to store until next time.
And for dessert…
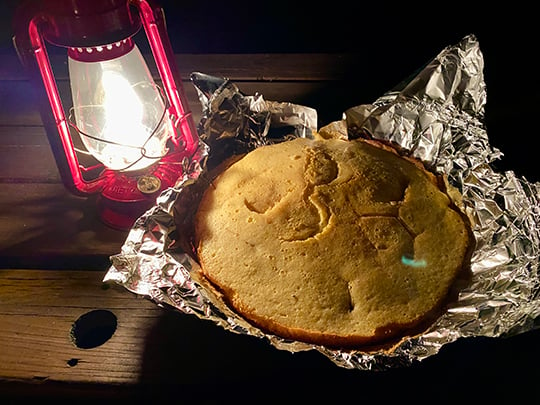
If nothing else, make a cake in your Dutch oven. It doesn’t get a whole lot easier, and who wouldn’t like warm cake around the fire? Here’s an easy recipe:
Buy a yellow cake mix and a can of cherry pie filling. Get two dozen briquettes going on the ground. Prepare the cake mix according to the instructions (will probably require eggs and oil).
Line your Dutch oven with heavy duty foil, with extra to grab onto later.
Spray the inside with cooking spray, or use a grill brush or folded paper towel to spread oil on the foil. Pour the cake batter in, then plop spoonfuls of cherry pie filling into it. Use it all, or save some to go onto the cake when it’s done.
Sprinkle coarse sugar over all of it to make a sweet crusty top, and put the lid on. Again, put half or more of the hot coals on the lid, and let it bake. Begin checking to see when the cake is done in 15 to 20 minutes.
Actual cooking time varies according to oven diameter, number of coals, etc., so keep an eye on it. Intermittent wafts of the sweet smell of cake is one clue it’s getting there. When finished, lift the entire cake out by lifting on the sides of the foil. Set it on your picnic table or another heat-proof surface, and scoop portions with a big spoon.
Try different pie fillings, if you like. Maybe apple or peach with added cinnamon, for instance. Go crazy and have fun. Just don’t plan on having leftovers.
Roy Heilman is a food-obsessed Minnesota outdoorsman and writer. Read what he’s been doing lately at neveragoosechase.com.

Wisconsin NRB OKs all three fisheries items on Sept. 23 docket
The Wisconsin Natural Resources Board (NRB) approved three rules involving fishing regulations, plus a Lake Superior scope statement, at its

Fall forest fungi: When the woods go quiet – look down
There are days when the forest feels so still that a single falling leaf is enough to grab a hunter’s

Minnesota artist Bob Hautman wins federal duck stamp contest for fourth time
Minnesota’s own Bob Hautman, from Delano, won the 2026 Federal Duck Stamp Art Contest today with his acrylic painting of
